The Sitecore XM Cloud Content SDK was recently released, and it offers a trimmed down, focused kit to build websites with XM Cloud. However, this new SDK hasn’t been put into the default starter kit codebase that gets created when you start a new project. This post will show you how to get your local development environment up and running with the Content SDK, and how to connect it to the Pages editor.
Create your project in XM Cloud Deploy
This step is straightforward. Use XM Cloud deploy to create your project, environment, and codebase. This will create you a repository from the xmcloud-foundation-head repository that Sitecore provides. You can also use the code-first approach if you so choose, but for the sake of simplicity this post assumes you let Sitecore create your project.
When the initial deployment is created, go ahead and create your site in the Sitecore Cloud portal. Choose the blank site starter template.
Once that process completes, go to the Desktop (you can find the Desktop from the Settings screen in the portal) and package up your site. You’ll want this to install to your local environments soon. You should also consider adding a Page Content component to the page to see something other than a blank screen when you load the site.
These are the paths you’ll need to package:
- /sitecore/templates/Project/<Your Site Collection>
- /sitecore/templates/Branches/Project/<Your Site Collection>
- /sitecore/system/Settings/Project/<Your Site Collection>
- /sitecore/media library/Project/<Your Site Collection>
- /sitecore/layout/Placeholder Settings/Project/<Your Site Collection>
- /sitecore/layout/Renderings/Project/<Your Site Collection>
- /sitecore/layout/Placeholder Settings/Project/<Your Site Collection>
- /sitecore/content/<Your Site Collection>
Set up your local environment
Once your project is created, clone your new repo and run through the steps to set up your local environment with Docker. Follow the instructions here: https://doc.sitecore.com/xmc/en/developers/xm-cloud/set-up-your-full-stack-xm-cloud-local-development-environment.html#prepare-the-environment
Once your environment is up and running, install the package you just created to your local CM, located at: https://xmcloudcm.localhost/sitecore/
You’ll need to get some environment variables from your local rendering host. Some of these are created when you run init.ps1 to scaffold your containers environment. You can get these from the Docker container, or from the .env file in the /local-containers folder in your project root.
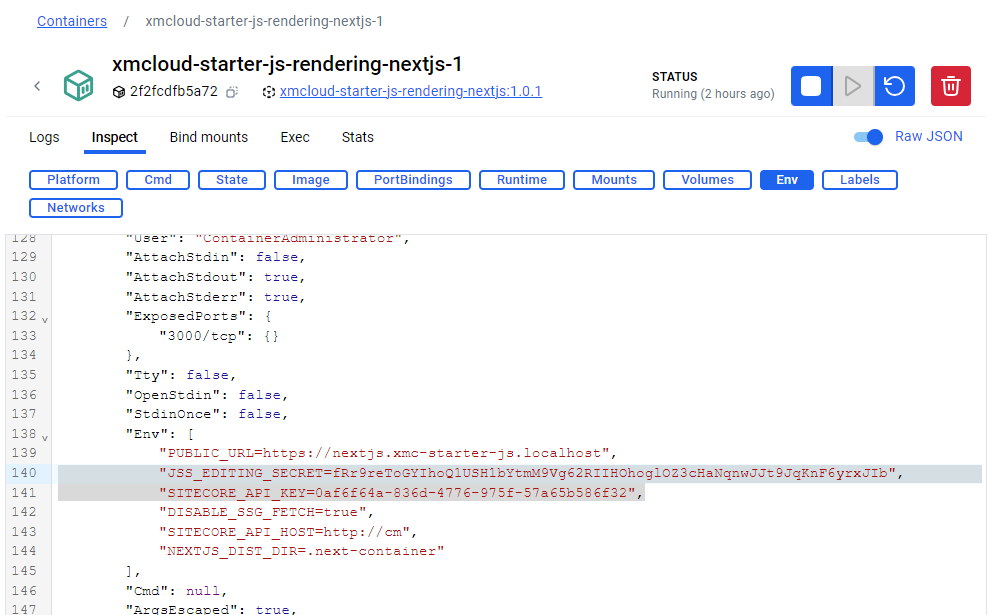
Copy the JSS_EDITING_SECRET and SITECORE_API_KEY values.
Create the Content SDK project
Next you’ll want to create the Content SDK project in your local environment. The documentation is located here: https://doc.sitecore.com/xmc/en/developers/content-sdk/create-a-content-sdk-app-locally.html
- Open a terminal in the /headapps folder of your project root
- Run the following command:
npx @sitecore-content-sdk/create-sitecore-jss nextjs
This will create a new folder under /headapps called next.js. The new Content SDK project is here.
Connect the Content SDK project to your local CM
To connect the new project to XM Cloud, the steps are described here: https://doc.sitecore.com/xmc/en/developers/content-sdk/connect-your-content-sdk-app-to-xm-cloud.html
To connect to a local CM running in Docker, the steps are similar. Create a .env.local file in the root of your Content SDK project. Add the follwing environment variables:
NEXT_PUBLIC_SITECORE_SITE_NAME=<your Site name from the package>
NEXT_PUBLIC_SITECORE_API_HOST=https://xmcloudcm.localhost
NEXT_PUBLIC_SITECORE_API_KEY=<your API key copied from the Docker container>
JSS_EDITING_SECRET=<your JSS Editing Secret copied from the Docker container>
DISABLE_SSG_FETCH=true
Then, in the terminal, run:npm installnpm run start:connected
Test your app in your browser at http://localhost:3000. If you did it correctly you should see a white page with the Page Content component you created and packaged previously.
Connect the Pages Editor to your local environment
Finally, we want to be able to edit our content and test our components in our local environment before we push and deploy anything. To do that, we need to set up Pages to use our local editing host.
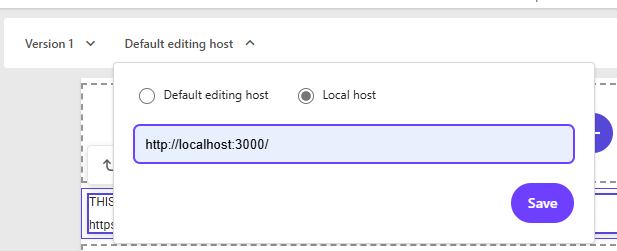
Go to https://pages.sitecorecloud.io/ and log in, then select your site. By default, you’re editing in your XM Cloud environment. Click the Default Editing Host dropdown and change it to localhost:
Afterward, you will see an error like this:

There’s one more step. We need to tell Pages to use our local CM as well. Open your browser tools (F12) and in the Application tab, add this key to local storage:Sitecore.Pages.LocalXmCloudUrl : https://xmcloudcm.localhost

After you do this, you should see your content rendering with the Content SDK and be able to edit the page.

Content SDK in Docker
This post does not cover is getting the Content SDK host running in a docker container. That isn’t strictly necessary to work locally with the Content SDK. However, if you’d prefer to replace the JSS rendering host with the Content SDK one, that will be covered in a later post.