How To Manually Deploy Sitecore Xdb Collection Databases

Every once in a while, there comes a time when your automation fails, or it doesn’t do exactly what you need it to do, and you’re faced with a choice. Do you alter the automation scripts or do you just do it by hand? Recently I faced a situation when installing Sitecore 9.1 where SIF just didn’t create the collection databases. Rather than spend time debugging SIF, I decided to just create the collection databases by hand. Turns out, it wasn’t that hard.

My first instinct was to pull the .dacpac files from the Sitecore provided WDPs (web deploy packages) and deploy them to SQL myself. Job’s done right? But how do we create that ShardMapManagerDb database? There’s no package for that.

If you watch what SIF does during an installation, you may have noticed it runs something called the SqlShardingDeploymentTool.exe. Turns out, that tool does most of the work for us, and we just have to invoke it with the right parameters. Credit to this excellent post from Kelly Rusk that explains what these parameters do. Here are the steps to do it yourself.

  1. Find the \App_Data\collectiondeployment folder in your XConnect instance. You can also extract this from the XConnect WDP package.
  2. Create a collection_user in SQL. In my case SIF did this for me (despite not creating the collection DBs), but you will need to make one if doing this completely from scratch.
  3. Prepare your command in notepad. You’ll need to pass the tool a lot of parameters, and feel free to reference the post linked earlier to understand them. Here’s one I used for reference:
    Sitecore.Xdb.Collection.Database.SqlShardingDeploymentTool.exe /operation "create" /connectionstring "Data Source=.\SQLEXPRESS;User Id=collection_user;Password=Asdf1234;Integrated Security=false;Timeout=30" /dbedition "Standard" /shardMapManagerDatabaseName "SC911.Xdb.Collection.Database.Sql.ShardMapManagerDb" /shardMapNames "ContactIdShardMap,DeviceProfileIdShardMap,ContactIdentifiersIndexShardMap" /shardnumber "2" /shardnameprefix "SC911.Xdb.Collection.Database.Sql.Shard" /shardnamesuffix "" /dacpac "Sitecore.Xdb.Collection.Database.Sql.dacpac" /log "tool.log"
    
  4. Run a command prompt as administrator and navigate to the directory with the tool. Execute your prepared command. If all goes well you’ll see a tool.log in that folder that ends with *** Everything is done. Sitecore xDB Collection SQL Sharding Deployment Tool is about to end its work. *** Make sure you see your databases in SQL.
  5. In the tool directory, you’ll see a few .sql scripts. We need to execute 2 of them to grant the proper permissions to the collection_user we created. In all cases, substitue the $(Username) variables with the name of your collection user.
  6. CreateShardApplicationDatabaseUser.sql should be run against each of the shard databases. CreateShardManagerApplicationDatabaseUser.sql should be run against the shard map manager database. The other SQL scripts in this directory are unnecessary, they execute a subset of the commands in these two scripts.

If all went well you should be able to see XConnect connecting to and logging data to the newly created collection DBs. Happy Sitecoreing!

Self-signed Certificates with Solr Cloud and Sitecore 9.1

If you’ve been using Sitecore 9 or 9.1, you know that all the services the platform depends upon must communicate using trusted, secure connections. This includes Solr. Sitecore’s instructions and the scripts provided by SIF helpfully walk you through setting up a secure Solr installation as part of standing up your 9.1 environment. Jeremy Davis has also created a wonderful powershell script to install Solr with a self signed certificate that I’ve used quite a bit.

But, what if you need to set up Solr Cloud? Sitecore has instructions for that too. These instructions largely send you off to the Solr documentation. My colleague Adam Lamarre has a post walking through the process of setting up Solr cloud on 9.1 as well, albeit on a single server.

If you follow the steps outlined in these posts, you’ll have Solr Cloud up and running on separate machines. But, when it comes time to create a collection you’re going to run into a problem. You may see something like this in the response:

{"responseHeader":
{"status":0,"QTime":33294},
"failure":{"solr3:8983_solr":"org.apache.solr.client.solrj.SolrServerException:IOException occured when talking to server at: https://solr3:8983/solr","solr2:8983_solr":"org.apache.solr.client.solrj.SolrServerException:IOException occured when talking to server at: https://solr2:8983/solr"},
"success":
{"solr:8983_solr":
{"responseHeader":{"status":0,"QTime":2323},"core":"sample_collection_shard1_replica2"}}}

We created our certificates, the nodes are up and running, Zookeeper is aware of them all, but the Solr nodes can’t seem to communicate with each other. So what gives? If we dig into the logs on any of the Solr servers, we get a little more insight into the problem.

2019-03-05 19:04:49.869 ERROR (OverseerThreadFactory-8-thread-1-processing-n:solr2:8983_solr) [   ] o.a.s.c.OverseerCollectionMessageHandler Error from shard: https://solr3:8983/solr
org.apache.solr.client.solrj.SolrServerException: IOException occured when talking to server at: https://solr3:8983/solr
at org.apache.solr.client.solrj.impl.HttpSolrClient.executeMethod(HttpSolrClient.java:626)
at
...
Caused by: javax.net.ssl.SSLHandshakeException: sun.security.validator.ValidatorException: PKIX path building failed: sun.security.provider.certpath.SunCertPathBuilderException: unable to find valid certification path to requested target
at sun.security.ssl.Alerts.getSSLException(Alerts.java:192)
...

What we’re seeing here is the Solr servers don’t trust each other. We need to fix that.

There’s a couple of things we need to do here. First, we have to get the self-signed certificates we created for each Solr node and install them on the other servers. On each Solr server, do the following,

  1. Open certlm.msc
  2. Expand Trusted Root Certification Authority -> Certificates and find your Solr certificate you created.
  3. Open the certificate and make a note of the thumbprint. We’ll need this later.
  4. Export the certificate. Make sure you check Include Extended Properties and Mark this Certificate as Exportable in the dialogue.
  5. When prompted for a password, use the same one you configured when installing Solr (the default is “secret”)

Once you have the certificates, you’ll need to install them on the other nodes. On each Solr server,

  1. Open certlm.msc
  2. Expand Trusted Root Certification Authority -> Certificates
  3. Import the certificates from the other 2 Solr nodes.

Try to hit the other Solr nodes from the browser on each server. For example, try accessing https://solr2:8983/solr/ from the Solr1 server. (You may need host file entries). If your certificates are installed properly, the browser will not warn you about an untrusted site.

There is one more thing we need to do. The Windows servers might trust our Solr nodes now, but the Solr applications themselves do not. If you take a look at the Solr installation steps, you’ll notice we’re creating a keystore file that holds the certificate for that Solr node (typically named . These keystore files needs to be updated to include the certificates from ALL of the Solr nodes, not just the one for the instance on that server.

We can easily do this with Powershell. We can do it with Java’s keytool.exe too, but we’re Sitecore people and probably more comfortable in Powershell! Remember those thumbprints we noted earlier? We’ll need them now.

Here’s the script, assuming your password is “secret”. Run this on any of the Solr nodes.

$password = ConvertTo-SecureString -String "secret" -Force -AsPlainText
Get-ChildItem -Path `
    cert:\LocalMachine\Root\<THUMBPRINT_FOR_SOLR1>,`
    cert:\LocalMachine\Root\<THUMBPRINT_FOR_SOLR2>,`
    cert:\LocalMachine\Root\<THUMBPRINT_FOR_SOLR3>; `
    | Export-PfxCertificate -FilePath D:\solr-ssl.keystore.pfx -Password $password

Take this generated solr-ssl.keystore.pfx file and copy it over the keystore file in each of the Solr nodes, then stop each node and restart them.

If we did everything correctly, when we try to create our collections again, it should go smoothly and you’ll be up and running with Solr Cloud and Sitecore 9.1.

For more information on the architecture of a Solr Cloud cluster and how to set one up for Sitecore, you can refer to my old blog series on the topic. It was written for 7.2, but the architecture principles haven’t changed. (including the need for a load balancer!)

Setup Sitecore 9.1 CM on HTTPS

Sitecore 9.1 comes bundled with a lot of new stuff, including a much improved Sitecore Install Framework. The process of setting up a local environment has been greatly streamlined, now you only need to run a script for installing prerequisites and then the XP0 installer itself. This gives you an instance of XConnect, Sitecore Identity server, both setup on HTTPS with trusted certificates. It will also install the Sitecore XP application for you and set it up on HTTP.

If you need to secure the Sitecore XP application as well, you could create a certificate in IIS and assign it to the HTTPS binding. However, this certificate won’t be trusted, and you’ll have the additional problem that Sitecore Identity Server won’t trust the site either, meaning you can’t log in over HTTPS. We’ll have to do a couple things to get past this.

You may see this error when trying to log into Sitecore 9.1 over HTTPS.

Create a new Trusted Certificate for IIS

First, we have to make a trusted certificate and assign it to our CM site. The certificate generated by IIS won’t cut it, because it uses the SHA1 encryption algorithm which is not accepted by modern browsers. Instead, let’s do what SIF does and make a certificate using Powershell. Alter the DnsName parameter to match the hostname of the Sitecore XP instance you’re working on.

New-SelfSignedCertificate `
    -DnsName "sc910.sc" `
    -CertStoreLocation "cert:\LocalMachine\My" `
    -FriendlyName "sc910.sc" `
    -TextExtension "2.5.29.37={text}1.3.6.1.5.5.7.3.1" `
    -KeyUsage DigitalSignature,KeyEncipherment,DataEncipherment `
    -Provider "Microsoft RSA SChannel Cryptographic Provider" `
    -HashAlgorithm "SHA256"

Next we’ll need to export that certificate out of the Personal store and into the Trusted Root Certification Authority. Again, this is exactly what SIF does for XConnect and Identity Server. We can script this too, but it’s easy to do using the UI.

  • In Windows, run certlm.msc. This is the Local Computer Certificate manager.
  • Expand Personal -> Certificates and find the sc910.sc certificate.
  • Right click, and chose Tasks -> Export. Accept the defaults and save the certificate somewhere.
  • Expand Trusted Root Certification Authority, right click Certificates and choose All Tasks -> Import
  • Choose your certificate file you just created, and again accept the defaults.

If you did everything correctly, you should see this certificate available in IIS when you try to set up the HTTPS binding.

Setting up the HTTPS binding in IIS with our new certificate.

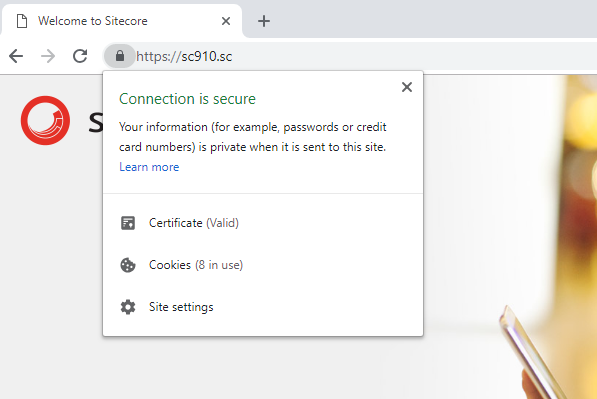
Try hitting your site in your browser, and you should not be prompted that the certificate is not trusted.

Chrome trusts our local Sitecore XP instance now.

However, we still can’t log into Sitecore. The login page says our client is unauthorized. What gives?

Configure Identity Server to Allow a New Client

We have to do one more thing, and that’s tell the Sitecore Identity Server about this new binding. To do this we need to edit a config in the identity server application. Open up \Config\production\Sitecore.IdentityServer.Host.xml in your identity server application folder. Look for the <Clients> block and add a line for our new secure XP binding.

<Clients>
  <DefaultClient>
    <AllowedCorsOrigins>
      <AllowedCorsOriginsGroup1>http://sc910.sc</AllowedCorsOriginsGroup1> 
      <AllowedCorsOriginsGroup2>https://sc910.sc</AllowedCorsOriginsGroup2>
    </AllowedCorsOrigins>
  </DefaultClient>
...
</Clients>

Try logging to Sitecore again, and this time you should be successful.